Step-by-step fixes for PC games, Windows, and everyday IT problems.
Latest guides
01 November, 2026
The problem
My OneDrive Pictures folder held 19 years of photos and videos, nearly 400 GB in total. When I tried moving the files in Windows File Explorer, OneDrive started downloading the online-only files. I wanted to sort everything in the cloud and keep useful album folders.
What I tested
I tried the synced OneDrive folder in Windows and the ChatGPT SharePoint connector. In my connector workflow, folder listings stopped at 200 items and I could not retrieve the remaining pages. I then used Windows PowerShell with Microsoft Graph to list file metadata and move files within OneDrive.
The solution
Use PowerShell and Microsoft Graph to build a read-only file index. Agree on the date rules, preview the proposed moves, and apply them only after checking the preview. Use the move log and cloud metadata to verify the result.
Why AI alone was not enough
AI helped me plan the job, write the scripts, check the file list, agree on date rules and understand errors. PowerShell performed the cloud requests after I signed in with Microsoft. Microsoft Graph provided access to the file metadata and folder moves. [1]
I still had to approve the plan and check the results. AI can produce incorrect code or choose the wrong year. It needs clear instructions, a read-only preview and a record of every move.
The sorting script should read names and metadata without requesting the photo or video contents. The script, Microsoft module and reports still use local storage. OneDrive sync or opening an online-only file may cause separate downloads. [2]
When I launched the original PC release of Death Stranding in 2020, it crashed before the main menu and showed an access violation (C0000005h). Updating Windows, DirectX, and the graphics driver did not resolve the crash on my laptop at the time.
Original test setup: Lenovo Y700, Intel Core i7-6700HQ, NVIDIA GeForce GTX 960M / Intel HD 530, and 16 GB RAM. The exact game build was not recorded. The GTX 960M falls outside 505 Games’ listed minimum GPU spec for the original release.
Updated 12 November 2026. Start with the official checks below. The original ZIP workaround and video are included as an alternate fix.
The original startup crash on the Lenovo Y700. Click the image to enlarge.
What to check first
Check your edition and hardware. This post covers the original PC release. Compare your GPU with the minimum requirements in the publisher’s guide. For Director’s Cut, check the requirements for that edition.
Verify the game files. On Steam, open the game’s Properties, select Installed Files, and run the integrity check. On Epic, open the game’s three-dot menu in your library, select Manage, then Verify. If you previously added files from the old ZIP, back up your saves and use a clean installation before testing.
Check the Microsoft runtime. 505 Games recommends the x64 Visual C++ Redistributable. Use Microsoft’s download page and select the x64 Visual C++ v14 package for a supported Windows version.
Test without overlays or tuning. Temporarily turn off overlays such as Steam or Discord. If you overclocked or undervolted your system, return it to its stock settings before testing.
This is the workaround that helped on my Lenovo Y700 with the original PC release. Reader reports were mixed. The download link was last updated on 22 December 2021.
In the original test, I installed the x64 and x86 Visual C++ packages listed at the time for 2015–2019 and 2013. The current Microsoft download page is linked above.
Open your Death Stranding installation folder. Back up any files with the same names, then copy the two extracted files into the main game folder.
Launch the game and use the checks below. To undo the workaround, remove only the two files you added and restore any originals you backed up.
Original video walkthrough
Workarounds from the comments
Try launching with Realtek audio temporarily disabled. If the game crashes when you start a new game or open Settings, open Device Manager → Sound, video and game controllers and temporarily disable Realtek High Definition Audio. Launch the game without sound, then re-enable Realtek audio. On the reader’s GTX 1660 Super setup, this let them play, but opening Settings still crashed. Re-enable the device after testing, even if this doesn’t help. Thanks to the anonymous reader who shared this workaround on 3 January 2021.
If the game stops opening after trying the ZIP, undo the change. Remove only the files you added, restore any originals you backed up, then verify the game files through Steam or Epic before trying again. Thanks to the anonymous readers who reported this issue on 21 January 2023 and 17 May 2024.
How to verify it worked
Launch the game from your library. If it reaches the main menu, load a save or start a new game and play for a few minutes. Close the game and launch it again to check whether the startup crash returns. Try one change at a time so you can tell what helped.
If it still crashes
Capture the full error message. Include the game edition and build, launcher, Windows version, GPU and driver version, and the checks you tried when opening a ticket with 505 Games Support. Their guide lists additional steps for specific error codes.
Close-up of the error from the original post. Click the image to enlarge.
Did your Galaxy S6 Edge screen decide to be unresponsive on fine day?
Appears as if the touch sensitivity is way below it should?
When this applies. This is a 2019 report from a Galaxy S6 Edge Plus with poor touch response. The original post describes a software fix that helped on that phone. Touchscreen problems can also have other causes.
Its allrght, your screen is allright. Its just a software issue!
A 2 minutes fix.
The solution
Before you start. Use the original steps below only if your phone shows the exact TSP FW update (General) option. If the option is missing, skip to The workarounds. Once the update starts, wait for it to finish before turning off the phone.
The Fix:
1. Dial *#2663# on your dial pad.
its gonna take you to another window with details of so many things. Dont mind any of them.
2. Press the "TSP FW update (General)"
and WAIT
these texts are gonna appear on the screen whilst you wait
Now Updating... Warning! Do not turn off!!
Update complete : PASS
3. Your touch sensitivity is back to normal. Thats it.
Check the result. Once the update shows PASS, test the same taps and swipes that were failing before.
The workarounds
If the service menu doesn’t open, restart the phone and test touch again.
If the screen is still slow to respond, clean and dry it. If you use a screen protector, check whether removing it helps.
If the same area stays unresponsive, use Samsung’s troubleshooting guidance or get the display checked.
So i search for the good old Galaxy s i9000's stock ringtone all over the internet and successfully failed to find it anywhere, so i had to extract it from an old backup of the stockrom I had.
Those of who want to download them may download it from the link that follows.
The original download link is unavailable. The replacement folder contains 45 .ogg ringtones for the 2010 Galaxy S. Thanks to Enrique Anthony Galea (u/enrique1786) for compiling and sharing the Samsung Galaxy Audio Library.
Metal Gear Solid helped bring stealth action to the mainstream, and people still play these games without worrying about how old the graphics look. Getting Metal Gear Solid 2: Substance to run on PC, though? That took me hours. I thought I’d save the hardcore Metal Gear Solid fans some of that time.
This guide covers the original Metal Gear Solid 2: Substance PC release on Windows 10. I wrote it for two problems: a black screen at startup and broken or missing textures once the game loads. If you’re playing Sons of Liberty through the Master Collection, use guidance for that edition. Konami’s Master Collection lineup.
The solution
What I tried in 2016
My 2016 post used a bundle that applied the 2.0 patch first, followed by graphics-card fixes and a modified executable. The links below point to the identifiable compatibility fixes individually. The exact GPU and driver versions used for the original post were not recorded, and the updated options have not been retested here.
If the game opens to a black screen
Original retail PC copy. Start with a clean installation and back up your saves before applying a patch. The original Konami 2.0 patch addresses some older ATI Radeon graphics issues. V’s Fix is a separate, unofficial project for Substance. Its documentation describes startup and graphics fixes for the retail release. Choose one approach first so you can tell which change helped.
GOG copy. If you already own this edition, test a clean GOG installation first. GOG includes fixes for certain startup hangs, hardware rendering, and missing textures and shadows. GOG’s list of included fixes.
The workarounds
If the game launches but textures are missing or broken
Close the game, open the bin folder in your installation, and run MGS2SConfig.exe if your copy includes it.
Open Drawing → Model Quality. Note your current setting, then try the second option in the list, as described in the original guide.
Launch the game again and check the same scene. If the graphics look the same or worse, restore the setting you noted.
How to verify it worked
For a startup black screen, confirm you can reach the main menu and load into a playable scene. For a graphics issue, compare the same scene before and after the change. Close and relaunch the game once more to make sure the improvement persists.
Original screenshots
The four original image links currently show Blogger placeholders.
Screenshot from the original Windows 10 guide. Click the image to enlarge.Second screenshot from the original Windows 10 guide. Click the image to enlarge.Original screenshot accompanying the Model Quality step. Click the image to enlarge.Additional screenshot from the original guide. Click the image to enlarge.
After Upgrading to Windows 10. My Apache just wont work;
wasted hours searching through internet. And I found this solution.
The following error appeared in the Application Event
Viewer (Administrative Tools):
The Apache service named reported the following error:
>>> (OS 10013) An attempt was made
to access a socket in a way forbidden by its access permissions.
:make_sock: could not bind to address 0.0.0.0:80.
Another application was hogging port 80.
The solution
The Obvious Candidates
There are a number of well-known Windows programs which
use port 80:
IIS
The most likely culprit is Microsoft Internet Information
Server. You can stop the service from the command line on
Windows 7/Vista:
net stop was /y
or XP:
net stop iisadmin /y
or Windows 10:
You can disable it by going to Programs and Features.
Click on Turn Windows features on or off. Uncheck Internet Information Services
and also Internet Information Services Hostable Web Core if it is checked.
Click OK to remove those applications.
SQL Server Reporting Services
SSRS can remain active even if you uninstall SQL Server.
To stop the service:
Right Click My Computer
Click Manage
Click Services and Applications
Open SQL Server Configuration Manager.
Select “SQL Server Services” in the left-hand pane.
Double-click “SQL Server Reporting Services”.
Hit Stop.
Switch to the Service tab and set the Start Mode to
“Manual”.
Skype
Irritatingly, Skype can switch to port 80. To disable it,
select Tools > Options > Advanced > Connection then
uncheck “Use port 80 and 443 as alternatives for incoming connections”.
What’s Using Port 80?
Further detective work is necessary if IIS, SSRS and
Skype are not to blame. Enter the following on the command line:
netstat -ao
The active TCP addresses and ports will be listed —
locate the line with local address “0.0.0.0:80″ and note the PID value.
Now right-click the task bar and select Start Task
Manager. Navigate to the Processes tab and, if necessary, click View >
Select Columns… to ensure “PID (Process Identifier)” is checked. You can now
locate the PID you noted above. The description and properties should help you
determine which application is using the port.
The Task Manager allows you to kill the process, but be a
little wary about doing that — especially if it’s “NT Kernel & System”.
Microsoft-HTTPAPI/2.0
NT Kernel & System is an essential service.
Stopping it will probably stop Windows in a blue-screeny-like way.
Checking whats using up Port 80.Enter the following at
the command line:
telnet 127.0.0.1 80
If you’re faced with a blank screen, type “GET” and hit
return. The chances are, you’ll see a line stating that Microsoft-HTTPAPI/2.0
is listening on port 80.
If that’s the case, open Services from Administrative
Tools and locate “Web Deployment Agent Service”. Stop the service and set it’s
startup type to “Manual”.
The Web Deployment Agent Service is deployed with WebMatrix
and was the cause of my woes. It may also be distributed with other
applications installed using Microsoft’s Web Platform Installer.
That caused me a few frustrating hours so I hope it
solves your Apache or WAMP start-up problems.
The workarounds
THE ARTICLE IS A RE-POST FROM Craig Buckler. Thanks to
Him I was able to solve my problem.
MGS Phantom Pain is a great game with great replay value. You can play it several times and still find a new way to end the mission. Its a masterpiece of stealth action. So if you like the game please support the developers by buying the game.
The problem
This is the save issue I ran into on the 2015 3DM PC release. Every time I closed the game and opened it again, I had to start from the beginning. I lost seven hours of progress on my first playthrough.
The solution
I searched a lot and came up with this solution. Back up your save folder before using the launcher again. On my setup, reopening it could replace my progress with the default 3DM saves.
First follow all the instructions in the 3DM instructions in the crack folder.
Open the game for first time using LauncherMGSTPPTimeZones provided in the crack.
Start the Game and Close it.
Open your Installed Directory in my case D:\Games\Metal Gear Solid V - The Phantom Pain
You cant change the read-only status of the 3DM folder. So you have to do this.
Right Click on mgsvtpp.exe and go to its Properties.
Now click the Security tab.
Now click the Edit button.
Select your own Windows account and check the Full Control box for that account.
Click Apply.
Now Start the Game using mgsvtpp.exe
Check that it saved. Reach a checkpoint, wait for the game to finish saving, then exit normally. Reopen mgsvtpp.exe and check whether your progress loads.
Warning. When I reopened LauncherMGSTPPTimeZones, it replaced my progress with the default 3DM saves.
Here is the link for 3DM saves past the prologue scene. Phantom Pain Saves
The workarounds
If you get a white screen at launch, try setting your Windows time zone to Beijing, as described in the original post.
When Windows goes to sleep or hibernates, an unattended download can pause or stop. Windows can turn off the screen separately while the laptop keeps running. If the laptop is overheating, troubleshoot the heat separately.
Downloading Mode For Laptops / Download Without Overheating IssueTOO much to download ? But afraid that you might burn your laptop downloading continuously for many days? When it comes to overnight downloading on laptop its not the same as how we put on our desktop, we may be a little afraid whether we are gonna burn our laptop because of all the overheating problems. And finally we end up tuning off the laptop every few hours. That's where we come in.. Ever thought about a perfect power plan for you laptop so that you can convert it into a Downloading Machine without worrying about any overheating issue.
The solution
Download Mode is a separate Windows power plan for long downloads. While the laptop is plugged in, the screen turns off after five minutes and Windows skips automatic sleep. The plan also clears the fixed hibernate timer where Windows uses one. On battery it uses Balanced settings. Keep the lid open while the download runs.
If your browser saved the file elsewhere, right-click the file, choose Copy as path, and replace the quoted file path in the command. Keep the plan ID at the end.
Switch it on and off
Search Start for Choose a power plan and open it. Take note of the plan already selected.
Select Download Mode. Expand Show additional plans if you see that option. Start the download and check that it continues after the screen goes dark.
When the download finishes, return to Power Options and select your usual plan again.
Download Mode doesn’t appear in Power Options
Reopen Power Options after importing. If it still shows only your current plan, open PowerShell as administrator. Before switching, run this command and keep the ID of your usual plan.
Run powercfg /getactivescheme again to confirm Windows reports Download Mode. After your download finishes, run this command if your usual plan was Balanced.
powercfg /setactive SCHEME_BALANCED
If you use a different plan, replace SCHEME_BALANCED with the ID you saved. If Windows says Download Mode doesn’t exist or won’t activate, try the manual sleep timer steps below.
The workarounds
Change the sleep timer manually
If you can’t activate Download Mode, temporarily change the plugged-in sleep timer in Windows 11.
Plug in the laptop and open Settings → System → Power & battery → Screen, sleep, & hibernate timeouts.
Under Plugged in, note your current sleep timer and set it to Never. Leave the screen timeout at a time you prefer.
When the download finishes, restore your previous sleep timer.
Launch The Command Prompt From
The Run Window. One of the quickest ways to launch the Command Prompt
is to use the Run window (press Win+R on your keyboard to open it).
Then, type cmd or cmd.exe and press Enter or click/tap OK.
3. In the command prompt
enter the following command, and press enter
powercfg -import "(Full Path of .pow file)"
NOTE:
Substitute
(Full Path of .pow file) in the command above for the actual full path of the
"Download Mode theinforoom.pow" file with its name and file extension
included within quotes.
For
example if the file is downloaded to the desktop
As an OTAKU. (Yes I am an OTAKU ). For those who dont know what an otaku is please check this out :p OTAKU!!!!....I have been a big fan of Anime and Manga since i started watching Naruto on Cartoon Network when I was a Kid and followed it for a decade. But when I started going to College campus I met a fellow otaku who introduced me to original Japanese Anime through Death Note and have been hooked to it since then.
So back to the topic where to watch Animes online Subbed for the Hardcores and Dubbed for the kiddies...
The original KissAnime and KissManga shut down in 2020. Those are the sites I wrote about back in 2015.
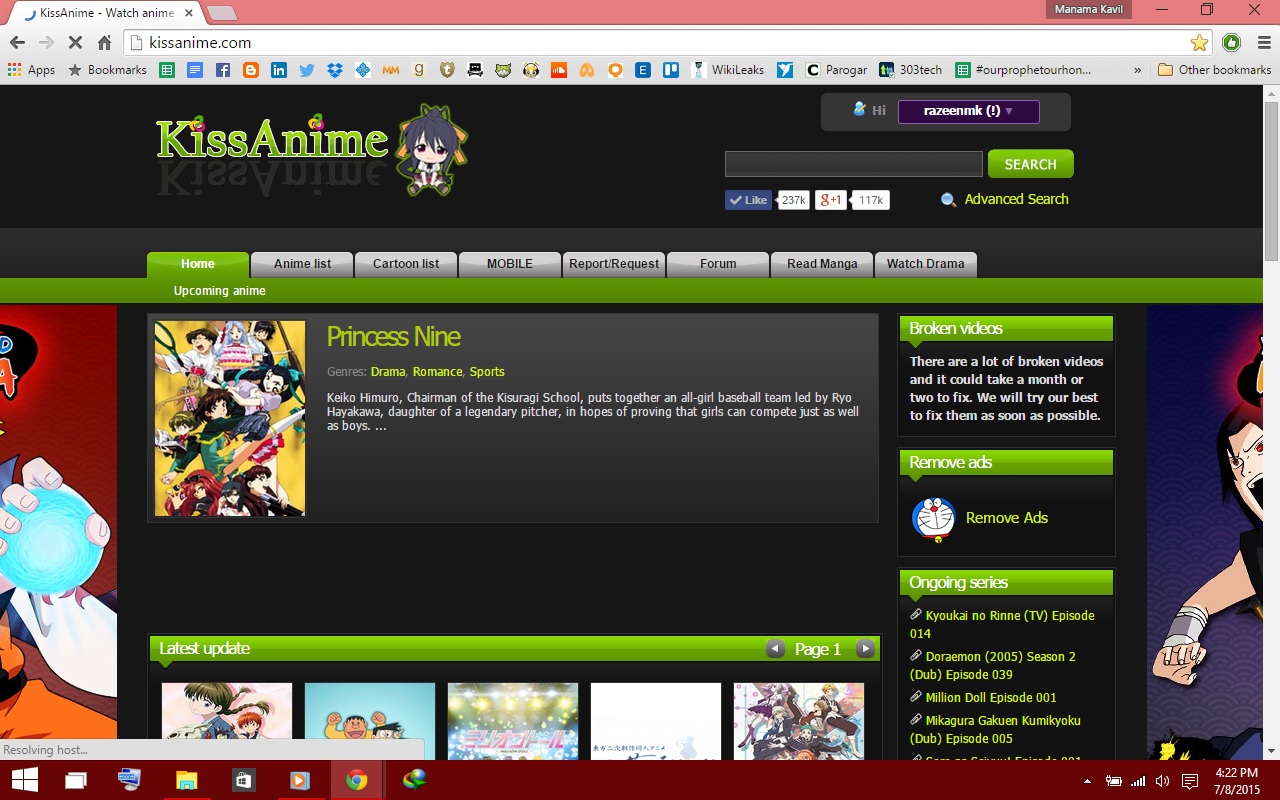
I watch it from KissAnime.com.
Its way better than the over hyped Crunchyroll thing and you don't have to pay to watch. Moreover you can bookmark and get a weekly mail alert for episode update. Also most of the animes are there in 360p 720p and 1080p.
Also if you have IDM (ofcourse the pirated ;p. Happy Pirating). Then you can download and watch the anime at your pleasure.
There is also mobile version of the site kissanime.com
Then there is KissManga.com for the manga.
No downloading feature in it. But you can add bookmarks. And the best one. One whole episode is loaded in a page so you can have an uninterrupted reading experience without the hassle of clicking next.
And for the reviews and to know where to start watching Animes and Mangas:
1. Kotaku's Review and Watchlist LINK
2. Rankings at MyAnimeList
3. News and Rantings AnimeNewsNetwork
Legacy guide. Originally tested in 2015 on an Intel Core i5-3210M laptop with AMD Radeon 7670M / Intel HD 4000 graphics and 4 GB RAM. This describes the original PC release.
What to look for. The game starts smoothly, then stutters more and more after a few minutes. Restarting helped temporarily. The original post describes the symptom, but it doesn’t establish the cause.
When it comes to bug free gaming on PC Rockstar Games have
always let us down, that includes the latest Grand Theft Auto V. Lots of people
have been facing problems playing the game and some have had trouble even
launching the game. Fortunately the gamers all around the world helped us fix
most of the problems regarding the game but one Problem still prevails. THE
STUTTERING / LAGGING problems which pretty much drives everyone crazy. Most of
you might have stopped searching a fix online for this problem.
DON'T GIVE UP. You have finally reached the right blog.
Issues I had:
1. The game starts up normally and is absolutely smooth [30
- 40 fps] for few minutes and then suddenly it starts to stutter. Leave it for
sometimes the stuttering gets worse to the point the games becomes unplayable.
2. The only thing that seemed to work was restarting the
game.
3. I tried all kinds of fixes out there [Changing the
process priority, Updating the graphics driver, disabling antivirus] and nothing
seemed to work.
i5-3210M
AMD 7670M / Intel HD 4000
4GB RAM
The solution
The Fix:
The fix is actually pretty simple you might wonder why you
never tried it before,
1. Go to C:\users\username\documents\Rockstar Games\GTA
V\settings.xml& change the DX value to 0 (use notepad)
<DX_Version value="0" />
2. Now start the game and go to settings , now this is the
important part, change the TEXTURE QUALITY to "HIGH" and restart the game.
3. Play the game and no more stuttering issues.
4.(Optional) If your Video Memory usage goes too high try lowering
all other settings and only put the texture quality High.
The workarounds
Playing GTA V Enhanced? The 2015 fix above was tested on the original PC release. For Enhanced, start with Rockstar’s PC troubleshooting guide.






 Posts

